
It may seem intimidating at first. However, with the correct information and attention to detail, growing weed is not as complicated as you may think.
Let’s take a look at how to harvest marijuana plants, and all the intricacies involved.
HOW TO TELL WHEN MARIJUANA IS READY FOR HARVEST
Before you begin the harvesting process, you need to know exactly when to harvest so that you can collect the best yield possible.
Different cannabis strains have different flowering times. Sativa, indica, and hybrid marijuana plants each have their period for harvesting.
When it comes close to the ideal harvesting time for your weed strain, there are two specific details to consider: the color of the pistils and the color of the trichomes.
Review your pistils first. You know those little hairlike structures you find on marijuana plants? Those are pistils. You’ll initially notice pistils appear white. At this stage, your plant is very young and not yet ready for harvest.
Keep an eye out for when those little hairs become darker, and start curling inwards. When the pistils start turning brown, orange, or pink, it’s time to start examining the presence of trichomes.
That frosty color a weed plant exhibits over time is the result of the trichomes (resin glands) ripening. Use a magnifying glass to closely monitor these little lollipop-like structures. You’ll notice, with close inspection, that trichomes transform from clear and transparent to milky white.
The ideal point of harvest is when most of these lollipops are milky white, while a small amount is turning amber. If you’ve left it too long and they’re all amber, it’s probably too late to harvest.
DIFFERENT HARVEST TIMES FOR DIFFERENT STRAINS
If you’re an experienced smoker or even a dabbler, you’ll know there are three primary groups of weed strains. These groups are indica, sativa, and hybrid. And they all have different harvesting times. So, it’s vital to know which type you’re dealing with when growing your own from seeds.
Indica, the “nighttime” strain, gives users a relaxed, body-high due to its higher level of CBD (Cannabidiol). Indica plants need 55 to 70 days to grow to a perfect harvest stage. If you want your indica marijuana to lean towards a sativa-like effect, harvest at approximately 55 days. And harvest at approximately 70 days for the full Indica effect.
Sativa, the “daytime” strain, gives a user a mood-lifting, energetic, creative mind-high that many cannabis smokers enjoy. Sativa takes longer to mature, so you’ll need to practice patience. Monitor your sativa plant carefully between 83 and 98 days for the presence of pistils and trichomes.
Those who wanted a relaxing, yet creative, pain relieving, yet mood-lifting, high developed the idea of hybrid weed. Inspect and harvest hybrid marijuana plants between 70 to 77 days into their flowering cycle.
BENEFITS OF HARVESTING MARIJUANA AT THE RIGHT TIME
We’ve now extensively discussed how to know when your cannabis plant is ready to be harvested. But why is harvesting time so important in the case of marijuana?
Harvesting too early or too late can both be disadvantageous to your final resulting cannabis. The timing of your harvesting determines the intensity of your high, as well as the medical and recreational effects you are seeking from your cannabis.
Too early equates to a lighter, less intense high when the weed is consumed. This is due to a significant percentage of cannabinoid, terpenoid, and flavonoid production having not been developed yet.
These chemical compounds are what give your weed its psychoactive effects, color, and flavor. And harvesting too early means you haven’t given them enough time to mature and ripen to their full potential.
Harvesting too late results in a heavier, numbing type of high that can cause couch-lock. If too many of the resin glands or trichomes have turned amber in color, a notable number of them have degraded. This means they no longer contribute to the high produced by your resulting harvest.
Get your timing right and the chemical compounds in your weed will be at their optimum balance. This will produce the high you desire based on the marijuana strain you’ve planted.
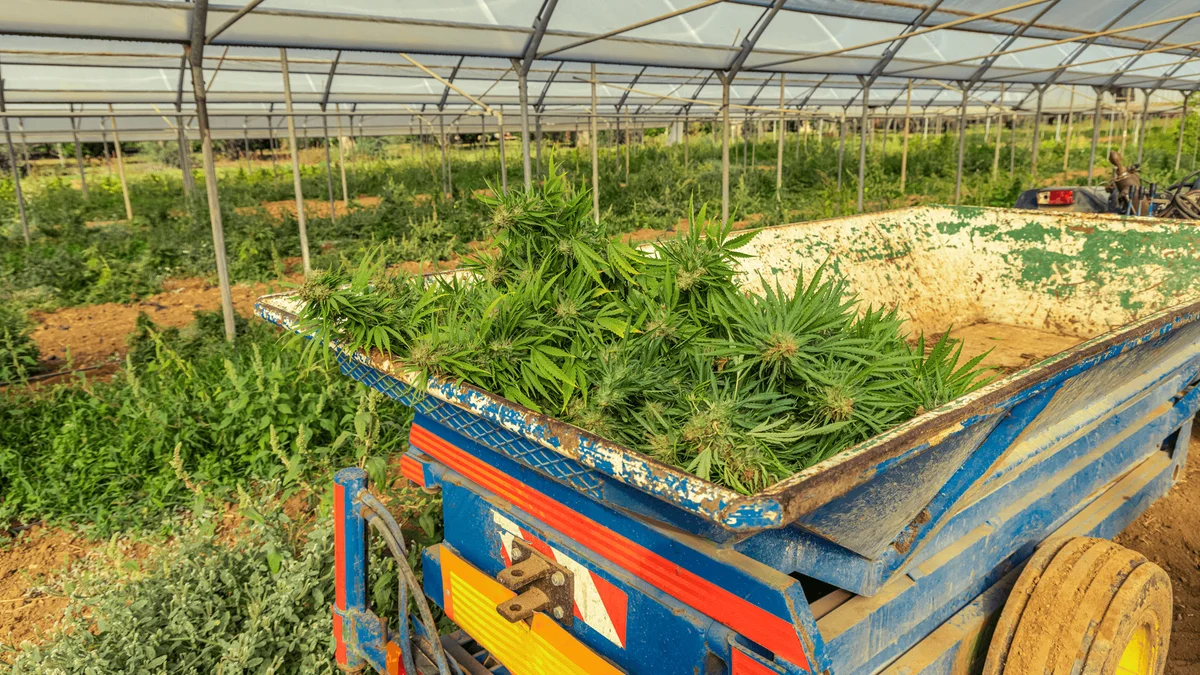
HOW TO HARVEST MARIJUANA
Now, let’s break down the best harvesting technique, including the tools you’ll require and the method you should follow.
Tools
- Shears or scissors
- Isopropyl or 70% alcohol for cleaning your tools
- Plastic gloves (harvesting can be a messy, sticky process)
- Plastic trays for branches
- A drying rack/box/tent/hangers
- A large, clean, open workplace like a table
Method
Before you begin, set all your tools up neatly in your work area. Ensure all your tools and your hands are thoroughly clean. Wear your plastic gloves at all times. And keep your rubbing alcohol on hand to clean your tools when they get a bit too sticky for comfort.
Cutting
If your plant is small, start by cutting the plant at its base with your shears or scissors. Then cut each branch one by one.
If your plant is large, you’ll need to cut the branches first since cutting the entire plant will become cumbersome.
Take each branch and carefully cut off the large fan-like leaves. And get rid of any bits and pieces that show signs of insects, mold, or fungi. Place these clean branches on your plastic trays.
Dividing into Buds
Next, it’s time to divide each branch into smaller twigs, and further into individual buds (the sparkly, trichome-covered petalless cannabis flowers).
If you’re using a drying rack or box, break up your branches into individual buds. But don’t break them up too much! The more you play with them, the more of the trichomes you’ll knock off.
If you’re using the hanging method for drying, hang the branches up before dividing them into buds.
Always maintain a high level of cleanliness and tidiness throughout the entire harvesting process.
DRYING AND CURING MARIJUANA AFTER HARVEST
Your next move is to dry and cure your cannabis. Let’s explore the steps involved in this process.
Drying Your Buds
You need a dark, ventilated place for drying your cannabis buds. If you’re using a drying rack or boxes, rotate them a few times a day so they maintain their shape.
If you’ve hung up your branches, after the necessary 10-14 days, commence with the breaking-apart process mentioned above.
If you’re growing your cannabis in a tent, you’ll require an exhaust fan to be running throughout those 10-14 days. Maintain a humidity level of 50% and a temperature of around 20ºC.
Keep monitoring your plants meticulously. If you ever spy mold growing, remove that bud and throw it away immediately. Mold can quickly spread to all your other buds, making the entire batch unsmokeable.
Curing Your Buds
After 10 to 14 days of drying, it’s time to cure your buds. At this point, you can weigh your yield since most of the buds’ moisture will have disappeared. Record these weights and then fill up sealable jars with your buds.
The curing process can take anywhere between three weeks to a few months. In the first two weeks of curing, ensure that you open your jars once a day. After an hour, seal them back up again.
HOW TO STORE MARIJUANA AFTER HARVEST
During and after curing, it’s crucial to maintain your weed harvest at an optimum state. THC degradation can result from exposure to oxygen and light. This will ultimately lessen the effects of your desired high when consumption time comes.
Protect your beautiful buds in sealed containers in the correct conditions mentioned above. Keep the environment at that same temperature of 68ºF (20ºC). And increase the humidity level to around 58-60% once the curing process has concluded.
A really useful habit to get into is tagging your jars. Write the name of the strain, harvesting, and curing dates, and weights on the side of each jar. Log this information for recording, revisiting, and repeating purposes.
COMMON MISTAKES TO AVOID WHEN HARVESTING
There are a few mistakes that cannabis growers tend to make while harvesting.
Number one is inadequate monitoring of the trichome and pistils. As mentioned, you want mostly cloudy, milky white resin glands, with the presence of a small percentage of amber. Any sooner or any later will harm your final product.
Number two is insufficient preparation. A lack of planning has possible consequences. These include an unsanitary working environment and tools, unsatisfactory drying apparatus and site, and not leaving enough time to get everything done properly.
Plan way ahead of time, and double (and triple) check everything before you dive in!
HOW TO MAXIMIZE YIELDS DURING HARVEST
Every grower naturally aims for a large yield of high-quality marijuana. Let’s go through a few tips and tricks on how to do so.
- During growing, support the plant’s structure with trellising, and make sure your container size allows room for growth. Large is never a problem, but small can prevent your marijuana plants from growing to their full potential. Prune the rotten, infected, moldy, or dying leaves off your weed plants during their growing time to keep your babies happy and healthy.
- Keep your temperature at 70-85°F (21-29°C) with your lights on and 58-70°F (14-21°C) when your lights are on.
- Humidity also affects plant health and resin production. So keep the humidity level of your marijuana plants’ environment at 50-70% during growth.
- However, don’t forget to keep the humidity level at exactly 50% during the drying and curing stages.
TIPS FOR BEGINNER MARIJUANA GROWERS
Pest And Insect Control
All plants, great and small, attract various pests and insects that can destroy your batch. Cannabis is no exception.
Whether sun-grown or indoor, your marijuana plants will require insect repellent. Fortunately, garlic spray and neem oil will do the trick. And they won’t harm your precious cannabis plants in the process.
Check your plants regularly for pests, including fungi, mold, and severe insect infestation. If caught early, the impact can be mild.
Soil
It’s crucial to choose the right kind of soil to allow your weed plants to thrive. Your soil should be a balance between muddy or clay-like and sandy. Specifically, loam is the texture you should aim for.
Clay is too tight and retains too much water. Sand is too loose and retains too little water. But loam is just right, retaining the right amount of nutrients and water to keep your plants healthy.
Light
Don’t opt for cheaper, bottom-of-the-range grow lights. If you want a decent harvest, you’ll need adequate equipment that won’t break halfway through growing and ruin your plants.
Go for LED grow lights, specifically quantum board LED grow lights. These lights offer the best lighting experience for your marijuana forest.
Fan
You’ll need a good fan for two reasons. Firstly, a fan maintains air circulation, bringing fresh air inside your grow tent, and forcing stale air out.
Secondly, a fan regulates the temperature of your grow room, which, as you know, is vitally important.
Tent
Bigger is always better when it comes to tent size to accommodate your plants’ inevitable growth. Ensure your tent is light-proof without any pesky light leaks. It’s best to have an observation window, a removable tray on the bottom of your tent, and ventilator meshes.
Ventilator meshes allow the fan to regulate the flow of fresh air.
Nutrients
During the growing/vegetative stage of your cannabis plants, keep mindful of a well-balanced fertilizer with all the right minerals and vitamins. We recommend a fertilizer that contains nitrogen, phosphorus, and potassium.
Once flowering has begun, lower the level of nitrogen, and increase the phosphorus level in your plants’ fertilizer.
Laws
This seems like an obvious one, but we quite often forget about this step at the height of our growing excitement.
Different countries, states, and areas have different laws regarding growing weed. Consider this and do your research before you attempt to grow.
CONCLUSION
Now you have all the information you need at your disposal. It’s time for you to start your cannabis-growing journey. Follow our guide and you’ll be harvesting your own primo weed in no time.
And if you’re looking for top-quality cannabis products to buy, check out Embarc today.