
Interested in making your own edibles or elevating your highs? Then you need to know how to properly decarb weed so that you don’t miss out on its many benefits. Decarbing weed is the secret to unlocking the full potential of your cannabis.
Not sure how to do it? Read on for more on how to decarboxylate your weed using different methods. We’ll also tell you the best time and equipment for each technique.
But first, let’s see what decarboxylation is and why it is essential.
WHAT IS DECARBOXYLATION?
Decarboxylation is a fancy word for a simple process – heating your cannabis to activate the cannabinoids in it. Cannabinoids are the vital compounds that give cannabis its effects, such as THC (tetrahydrocannabinol) and CBD (cannabidiol).
When you grow cannabis, the cannabinoids are in their acidic forms: THCA (tetrahydrocannabinolic acid) and CBDA (cannabidiolic acid). These forms have little or no effect on you when you consume them.
To get high or feel relaxed, you need to convert them into their active forms: THC and CBD. That’s what decarboxylation does. It removes a carboxyl group from the cannabinoids and makes them ready for your body to use.
But decarboxylation is not a one-size-fits-all process. Different methods require different temperatures and times to achieve the best results. You’ll also need to consider the type of cannabis you are using, such as indica, sativa, hybrid, flower, dab, etc.
WHY IS DECARBOXYLATION NECESSARY?
Wondering why exactly you need to decarb your weed if you want to smoke or vape it? The truth is, smoking or vaping does decarb your weed – but not very efficiently. You lose some of the cannabinoids in the process, and you don’t get the full benefits of your cannabis.
It’s also a must to decarb weed when you don’t plan on smoking or vaping it. There are many different ways of consuming weed, including making edibles like gummies, brownies, cake, butter, tincture, oil, and more.
For all methods, you need to decarb your weed before you use it. Otherwise, you’ll end up with a weak or ineffective product.
So, here is why weed decarboxylation is necessary:
- It makes your cannabis more potent by activating the cannabinoids in it, such as THC and CBD.
- Decarbing enhances the flavor and aroma of your weed by releasing the terpenes in it – the aromatic compounds that give weed its characteristic smell and taste.
- It allows you to use your cannabis in different ways, such as smoking, vaping, or making edibles.
- It improves your health and well-being by providing you with the effects and benefits of cannabis. These include euphoria, relaxation, pain relief, anti-inflammation, anti-anxiety, mood enhancement, and more.
However, decarboxylation also has some risks that you should be aware of. These include losing terpenes and flavor, burning or degrading cannabinoids, creating unwanted byproducts, and losing potency over time.
To avoid the risks, you need to make sure you decarboxylate your cannabis at the optimal temperature and time for your desired cannabinoid.
Also, use a clean and dry container, and store your cannabis correctly. More on this below!
WHAT SUPPLIES AND EQUIPMENT DO YOU NEED TO DECARB WEED PROPERLY?
If you want to decarb your weed properly, you will need a few things – some of which you already have in the kitchen.
Decarbing weed is not complicated but requires attention and care to get the best results. These are the items you’ll need for the process and why they are important.
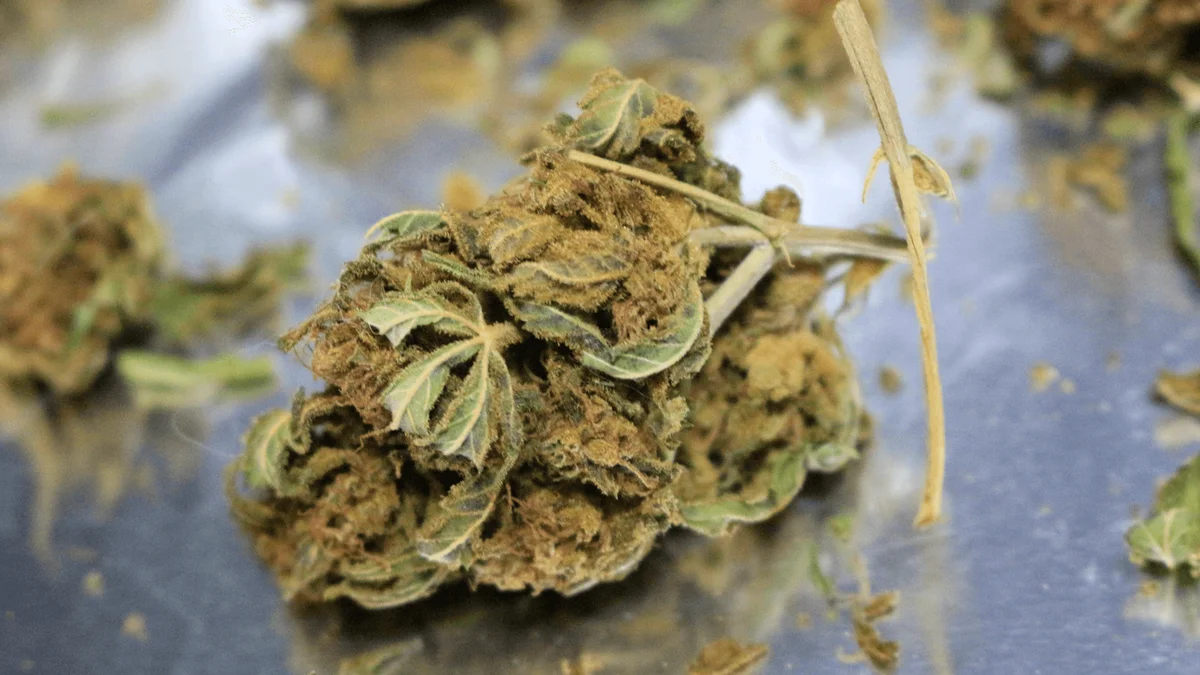
Cannabis Flower
You can use any strain or type of cannabis flower, such as indica, sativa, hybrid, dab, etc. Just make sure that it’s dry and cured before you use it. Fresh or moist cannabis will not decarb well and may result in moldy or uneven products.
Grinder
You’ll need a grinder to break down your cannabis flower into small pieces. Doing so will help the heat reach all the cannabinoids evenly and speed up the process.
You can use any grinder you have, such as an electric, manual, or even a coffee grinder. Ensure your grinder is clean and free of any contaminants.
Baking Sheet
You’ll need a baking sheet to spread your weed evenly on it. For this, choose a sheet that fits in your oven. You can alternatively use a glass or ceramic dish instead of a baking sheet if you prefer.
Parchment Paper Or Foil
Parchment paper or foil is necessary for covering your baking sheet and to prevent your weed from sticking to it.
Parchment paper is better since it’s more heat-resistant and less likely to tear or burn. However, foil can also work if you don’t have parchment paper. Use enough foil to cover the entire baking sheet and fold the edges over the weed.
Oven
You will need an oven to heat your weed and activate the cannabinoids in it. Any range will do, from convection to electric oven.
You can even use a microwave if you don’t have an oven. However, ensure your oven or microwave has a temperature setting and a timer that works properly. If you do plan to use a microwave, you will need a microwave-safe dish to decarb your flower in. Also, do not use foil. Instead, use a microwave-safe dish lid.
Airtight Container
You’ll need an airtight container to store your decarbed weed after it cools. You can use any kind of container, including a glass jar, plastic jar, or metal tin. Make sure you clean and dry your container before you use it.
You’ll also need to keep your container away from light and heat to preserve the potency and quality of your decarbed weed.
ALL ABOUT THE DECARBOXYLATION PROCESS
You already know that decarboxylation activates the cannabinoids in your cannabis plant. But how do you do it properly? What are the best temperatures, times, and methods for decarboxylation?
Let’s answer these questions and more to give you the best tips and tricks to decarb your marijuana like a pro.
What Is The Best Temperature For Decarboxylation?
The best temperature for decarboxylation is around 240°F (115°C). This is the ideal temperature to activate the cannabinoids without burning or degrading them.
For instance, higher temperatures may cause your weed to lose some of its potency and flavor. On the other hand, lower temperatures may not activate all the cannabinoids and it’ll take longer to complete the process.
However, you can adjust the decarbing temperature to suit your goals. For example, if you want to preserve more terpenes in your cannabis, you can use a lower temperature of around 200°F (93°C). If you want to activate more CBD in your cannabis, you can use a higher temperature of around 280°F (138°C).
What Is The Best Time For Decarboxylation?
The best time for decarboxylation is between 30 to 45 minutes. This timeframe is enough to extract all the cannabinoids without burning or degrading them.
Just like the temperatures, longer times may cause your cannabis to lose potency and flavor. Similarly, shorter times may not activate all cannabinoids from the flower.
Methods For Decarboxylation
Oven Decarb
An oven is the easiest and most convenient way to decarb your weed at home. All you need is an oven, grinder, baking sheet, parchment paper or foil, and cannabis flower.
Here are the steps to follow:
- Preheat your oven to 240°F (115°C).
- Grind your cannabis flower into small pieces.
- Line the parchment paper or foil on a baking sheet and spread your weed evenly.
- Bake your weed for 30 to 45 minutes.
- Transfer the weed from the oven and let it cool down.
- Store your decarbed weed.
Using A Microwave
Decarbing weed using a microwave is a quick and convenient approach, although it may not provide as precise control over temperature as using an oven.
You’ll need a microwave, a microwave-safe container, and cannabis flower. You’ll want to use ground flower, so consider having a grinder as well.
Here’s how to decarb your weed in the microwave:
- Place and spread the ground cannabis evenly in the container. Avoid overcrowding to ensure uniform decarboxylation.
- Next, cover the container with a microwave-safe lid or microwave-safe plastic wrap. Leave a small vent to allow some steam to escape.
- Set your microwave to low power, preferably 40% of the microwave’s power, and set the timer to 45 seconds to 1 minute.
- Keep a close eye on the cannabis during microwaving to prevent burning or overheating. It should turn a slightly toasted, light brown color.
- If needed, continue microwaving in short intervals (10 to 20 seconds) until you achieve the desired color and texture.
- Once decarboxylation is complete, remove the container from the microwave and let the decarbed cannabis cool down completely before use or storage.
Using A Sous Vide Machine
Decarbing weed with a Sous vide machine offers precise temperature control, ensuring optimal decarboxylation without the risk of overheating or burning the cannabis. So, if you have one on hand, this is a great method to use. You’ll also need a high-quality vacuum-sealed bag and ground cannabis.
Here’s a step-by-step guide on how to decarb your weed using a Sous Vide:
- Preheat the water bath: Fill a container with water, attach the Sous Vide machine, and set the temperature to around 220°F to 240°F (104°C to 115°C).
- Place the ground cannabis into a vacuum-sealed bag and remove any excess air before sealing it.
- Carefully lower the sealed bag of cannabis into the preheated water bath, making sure it’s fully submerged.
- Determine the desired decarboxylation duration and set the timer on the Sous Vide machine accordingly. This depends on your flower and desired outcome, including more terpenes or cannabinoids. Aim for around 4 to 6 hours.
- Monitor the water bath temperature and periodically check the cannabis for the desired color and texture.
- Once the timer goes off and the weed is ready, transfer the bag from the water bath and allow the decarbed cannabis to cool before using or storing it.
The Infused Oil Method
The infused oil method combines the decarboxylation process with the creation of cannabis-infused oil. The technique offers versatility, allowing you to use the oil for cooking or topical applications, providing flavor and therapeutic benefits.
Follow these steps to infuse the oil with activated cannabinoids:
- Heat cannabis and carrier oil (e.g., coconut or olive oil) together in a saucepan or double boiler setup.
- Maintain a low and gentle simmer, stirring the mixture occasionally.
- Let the mixture simmer for at least 2 hours. You can simmer for up to 6 hours to extract the potent cannabinoids and activate them.
- Strain the infused oil to separate the plant material.
- Store your product.
HOW TO STORE DECARBOXYLATED WEED
You’ve just decarboxylated some weed and are ready to enjoy its potent effects. But wait, don’t rush to use it all at once. Why not store some of it for later use?
All you need are these simple tips and tricks to preserve decarboxylated weed properly:
Dry The Weed
Before you store your weed, you want to ensure it’s completely dry. If it’s still moist or sticky, it can attract mold and bacteria, which can totally ruin your weed.
If your weed is still a little moist, you can put it back in the oven for 5 – 10 more minutes to dry, but be careful to not overdry it. Take it out of the oven once it attains the best color.
Choosing The Right Container
Once your weed is dry, you’ll need a suitable container to store it in. You want something airtight, light-proof, and odor-proof. This will prevent oxygen, light, and moisture from getting to your weed and degrading its quality.
Some good options are glass jars, metal tins, or vacuum-sealed bags. You can also use plastic containers, but ensure they are food-grade and BPA-free. Avoid using plastic or zip-lock bags, as they let air and light in and leach chemicals into your weed.
Before putting your weed in, dry the container thoroughly with soap and water. Any dirt or moisture can contaminate your weed and affect its quality.
You can also add a humidity pack or a piece of bread to the container. This will regulate the moisture level in the container and prevent your weed from getting too dry or too moist.
Label The Container
Now that your storage container is ready, label it. Write down the date and strain of the weed you are storing. Doing so will help you remember when you decarboxylated it and what effects it has.
Use a permanent marker or durable sticker to label the container for the best results.
Store The Container
The final step is storing the container in a cool, dark, and dry place.
Your ideal temperature range for storing decarboxylated weed is 60°F to 70°F (15°C to 21°C). The perfect humidity level is between 55% and 62%. You can use a thermometer and a hygrometer to monitor these conditions.
Some possible places to store the container are a cupboard, closet, or drawer. Avoid areas exposed to sunlight, heat sources, or humidity, such as windowsills or bathrooms.
Monitor The Weed
Even if you store your weed correctly, it can still deteriorate over time as you continue handling it. So, monitor it every few weeks for signs of mold or spoilage. If you notice any white, gray, or green fuzz on your weed, or if it smells musty or sour, discard it immediately.
Do not consume moldy weed since it can cause health problems. If your weed looks and smells fine, you can enjoy it as usual!
THE BEST RECIPES FOR DECARBOXYLATED WEED
Decarboxylated weed opens a world of culinary possibilities, allowing you to infuse cannabis into various recipes and create delightful edibles.
Here are the best decarbed weed recipes to make today:
- Cannabis-Infused Butter: Create it by melting butter and stirring in decarbed weed. Simmer the mixture for a few hours, strain it, and then use it in various recipes like brownies, cookies, or as a spread on toast.
- Ganja Gummies: Make flavorful cannabis-infused gummies by mixing flavored and unflavored gelatin, sweetener, and infused liquid. Heat the mixture, pour it into molds, and set it in the refrigerator for delicious, cannabis-infused treats.
- Cannabis-Infused Oil: Heat a carrier oil with decarbed weed, simmer for a few hours, and strain to create cannabis-infused oil. Use this oil in salad dressings, sautés, or drizzle over-cooked dishes for an extra kick.
- Potent Pasta Sauce: Sauté onions, garlic, and vegetables in olive or cannabis-infused oil. Add tomato sauce, simmer with decarbed weed, and season to taste. Serve this elevated pasta sauce over your favorite pasta for a flavorful meal.
- Elevated Hot Chocolate: Heat milk or a non-dairy alternative, and add cocoa powder, sweetener, and decarbed weed. Simmer the mixture for 15-20 minutes, strain, and serve warm. Add optional toppings like whipped cream or marshmallows for a delightful cannabis-infused hot chocolate experience.
THE BOTTOM LINE
Ready to decarb your cannabis? With the guide above, you have all the information you need to get started. Remember, decarboxylated weed is potent, and to maintain that effect, you want to store it properly.
Don’t have the best marijuana or weed flower? Not to worry, Embarc everything you need, from fresh flowers to edibles and concentrates to vapes! Visit one of our dispensaries today.